Use the Layout Editor to lay out your pages. The Microsoft Excel-like Layout Editor’s row and column interface is very familiar to almost everyone.
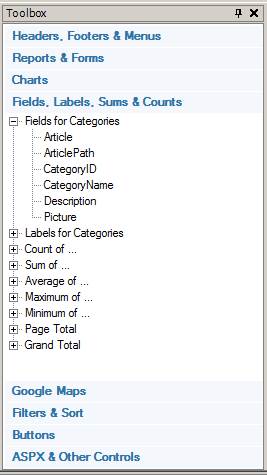
Drag individual fields, labels, reports, forms and controls from the Toolbox onto the Layout Editor. Then rearrange them to achieve your desired configuration. You can even combine multiple controls into a single cell.
Add rows and columns. Easily add multiple rows and columns and customize your look-and-feel as you like.
Merge and split cells. You can merge cells horizontally or vertically.
Finally, switch to the Live Preview mode to see how your page looks.
Controls are pre-bound to available fields (e.g., First Name). Simply drag them from the Toolbox onto your page – no need to worry about hooking them up. Drag complete report and form panels – parent or child, record or table – onto your page. Then switch to Live Preview to see them in action.
And, you can change their properties via the Property Sheet after adding them to your page.
Drag and drop panels into different cells or move the panel outside the current panel by cutting and pasting
Quckly move an entire group of cells and controls to another location on the same page or to another page.
Select a cell, right-click, and select Insert, Tabs. You can put panels, fields, or other controls within the tab panel.
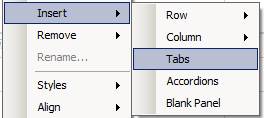
To remove tabs, select a cell, right-click and select Remove, Tabs.
You can rename a control by changing its “ID” property in the Property Sheet.
Example: Using Tab Groups to Organize Fields
Example: Placing Master and Detail Panels within the Same Tab Group
Navigating Your Application in Layout Editor
Using the Layout Editor and Toolbox
Customizing Page Contents with the HTML Editor
Configuring Cell, Row and Table Styles
Placing ASP.NET Directives in Application Pages
Using Frames in Application Pages