Updated August 26, 2010
Iron Speed Designer V7.1 and later
Step 1: In the Layout Editor, drag a Crystal Reports control from the Toolbox onto your page. The Configuration Wizard is automatically displayed.
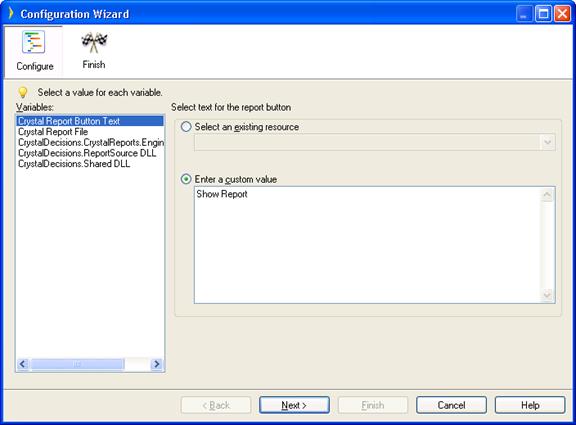
Step 2: In the Configuration Wizard, specify the text you want displayed on the button in your application. By default, the text is “Show Report”.
Step 3: Select “Crystal Report File” on the Variables list and choose your .RPT report file.
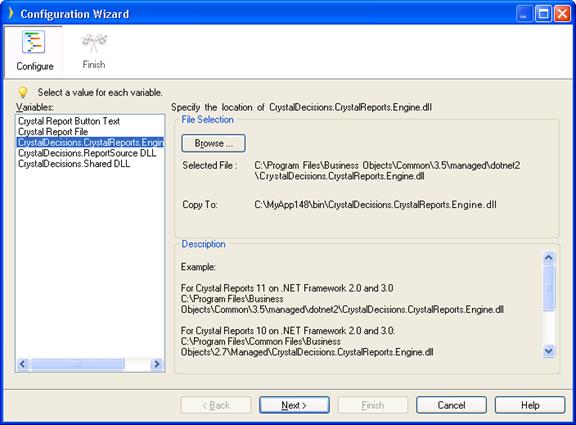
Step 4: Select “Browse...” and locate the path for CrystalDecisions.CrystalReports.Engine.dll file. Similarly select the “CrystalDecisions.ReportSource.dll” and “CrystalDecision.Shared.dll” files.
Step 5: Click “Finish” to complete the configuration.
Step 6: (Optional.) In the Application Explorer, select the page’s.CS or .VB code-behind file.
Step 7: (Optional.) If your report requires parameters, uncomment the following code and specify the required parameters. If your report requires parameters, your application will not run unless they are specified!
C#:
//CrystalDecisions.Shared.ParameterDiscreteValue paramValue = new CrystalDecisions.Shared.ParameterDiscreteValue();
//paramValue.Value = "ALFKI";
//crReportDocument.SetParameterValue("CurrentCustID", paramValue);
//**********************************************
Step 8: (Optional) If your report requires database sign-in, uncomment the following code and specify database sign-in information. During development, you may not receive any error if you do not specify the database sign-in information. However, when deploying your application, you may receive a “Logon failed” error, so please make sure to specify the database sign-in information.
////define and locate required objects for db login
//CrystalDecisions.CrystalReports.Engine.Database db = crReportDocument.Database;
//CrystalDecisions.CrystalReports.Engine.Tables tables = db.Tables;
//CrystalDecisions.Shared.TableLogOnInfo tableLoginInfo = new CrystalDecisions.Shared.TableLogOnInfo();
////define connection information
//CrystalDecisions.Shared.ConnectionInfo dbConnInfo = new CrystalDecisions.Shared.ConnectionInfo();
//dbConnInfo.UserID = "username";
//dbConnInfo.Password = "pwd";
//dbConnInfo.ServerName = "DBName";
////apply connection information to each table
//foreach (CrystalDecisions.CrystalReports.Engine.Table table in tables)
//{
// tableLoginInfo = table.LogOnInfo;
// tableLoginInfo.ConnectionInfo = dbConnInfo;
// table.ApplyLogOnInfo(tableLoginInfo);
//}
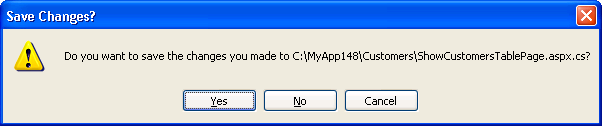
Step 9: Build and run your application. Press “Yes” if you are asked to save the changes.
You may need to disable smooth panel update feature in order for the Crystal Reports button to function properly.
Creating a Crystal Reports Report File
Adding a Crystal Report to Your Iron Speed Designer Application
Adding Crystal Reports References to Your Project
Opening Crystal Reports PDF Files in Separate Browser Windows
Deploying a Crystal Reports Application