SharePoint applications built in Iron Speed Designer are easily deployed to your SharePoint server using the procedure described below.
It is important to note that only applications developed in the same version of Iron Speed Designer can be deployed to the same Microsoft SharePoint hosting application (port). Web applications are deployed to the common Layouts folder of the Microsoft SharePoint server, and their respective DLLs are placed in the \bin folder of the SharePoint hosting application (port). This means all DLLs with the same name (such as BaseClasses.dll, AjaxControlToolkit.dll, Ciloci.dll, Reports.dll, MySql.Data.dll, FredCK.FCKEditorV2.dll and CarlosAG.ExcelXmlWriter.dll) are shared between all applications deployed to the same SharePoint hosting application (port) and so your applications must use the same version of these DLLs.
If you have applications developed in older release of Iron Speed Designer you must first retract them from your SharePoint server, migrate those applications to the current release of Iron Speed Designer, and then re-deploy the updated applications to your SharePoint server.
Follow these steps to deploy an Iron Speed Designer Web Application for SharePoint:
Step 1: In Iron Speed Designer, use the Deployment Wizard to create the SharePoint Solution Package (.WSP) file in the application deployment folder, e.g.:
…\<MyApp_Deploy>\
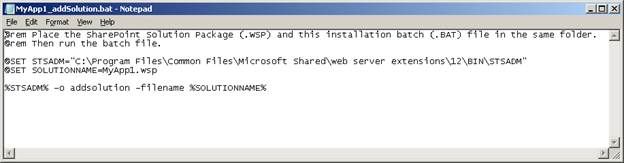
In addition to the .WSP file, sample installation (MyApp_addSolution.bat) and uninstallation (MyApp_removeSolution.bat) batch files are also created.
See Deploying Applications with the Deployment Wizard for details.
Step 2: Copy the SharePoint Solution Package (.WSP) file and the sample batch (.BAT) files to the SharePoint server in a temporary location. For example, copy the files from the deployment folder to C:\Temp on the SharePoint server.
Step 3: On the SharePoint server, edit the sample installation batch file (.BAT) commands to match your situation. Specify the location of the STSADM command on the SharePoint server. Typically this is located in the Program Files folder under the Microsoft Shared sub-folder, e.g.:
SharePoint 2010:
@SET STSADM="C:\Program Files\Common Files\Microsoft Shared\web server extensions\14\BIN\STSADM"
SharePoint 2007:
@SET STSADM="C:\Program Files\Common Files\Microsoft Shared\web server extensions\12\BIN\STSADM"
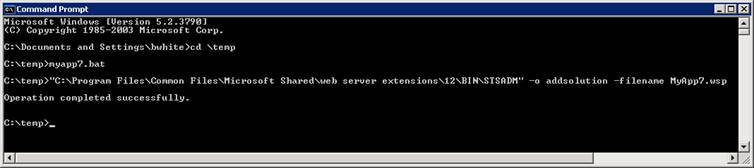
Step 4: Run the modified installation batch (.BAT) file in a command window from the same folder where the .WSP and the .BAT files are located. This adds the SharePoint Solution Package (.WSP) file to the SharePoint solution store.
Note: You must have administrator rights on the Microsoft SharePoint server to run the installation batch file; otherwise you will get an ‘Object reference is not set to an instance of an object’ error.
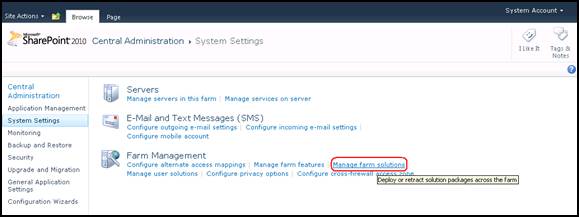
Step 5: Use the SharePoint Central Administration web page to deploy the solution.
On the SharePoint server, double-click the SharePoint Central Administration utility. Select System Settings on the left vertical menu in the Central Administration click on Manage farm solutions:
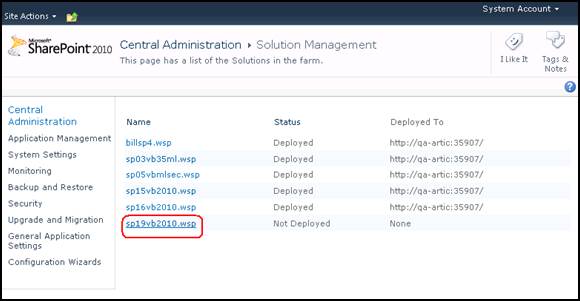
Select solution and select deploy solution:
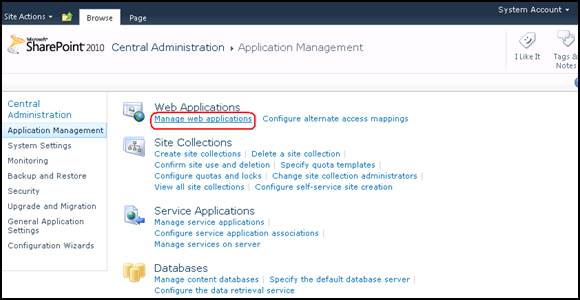
On the Deploy To dropdown list, select the web application where the solution will be deployed. You can also deploy the solution to the farm by selecting "All content Web applications".
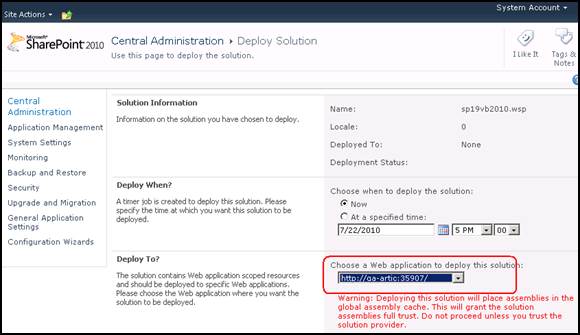
IMPORTANT: Make sure this web application does have a default root site collection (/). If it does not you first have to create it! Site collections are created on the Central Administration / Application Management screen.
Once the solution is successfully deployed, additional configuration steps are still needed to update the files before the application will work.
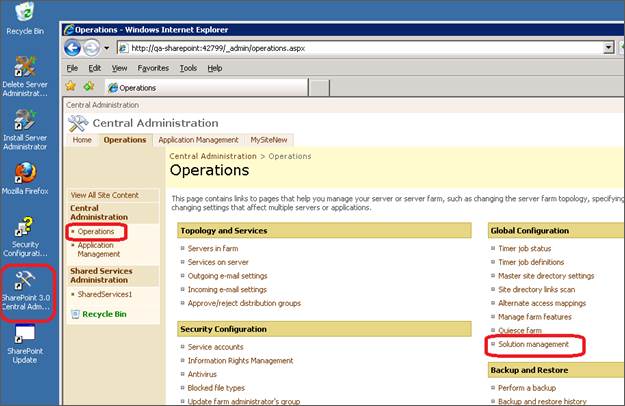
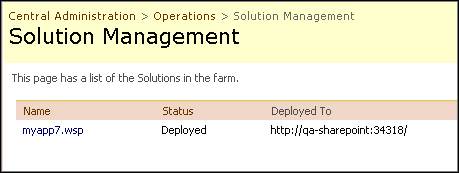
On the SharePoint server, double-click the SharePoint Central Administration utility. Click the Operations tab, and select Solution Management from the Global Configuration section. Then select the solution you want to deploy.
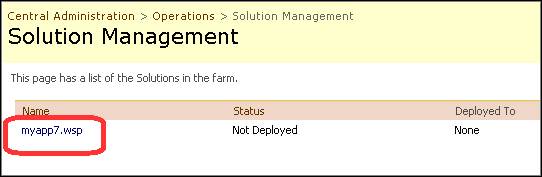
Click the “Deploy Solution” button to begin the deployment.

On the Deploy To dropdown list, select the web application where the solution will be deployed. You can also deploy the solution to the farm by selecting "All content Web applications".
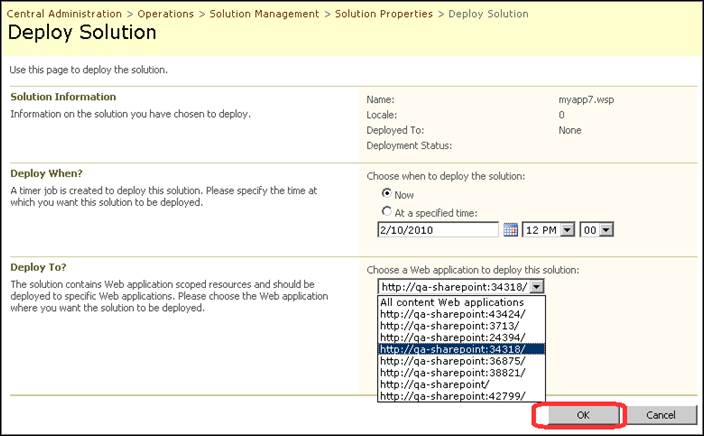
Any deployment errors will be shown here.
IMPORTANT: Make sure this web application does have a default root site collection (/). If it does not, you first have to create it! Site collections are created on the Central Administration / Application Management screen.
Once the solution is successfully deployed, additional configuration steps are still needed to update the files before the application will work.
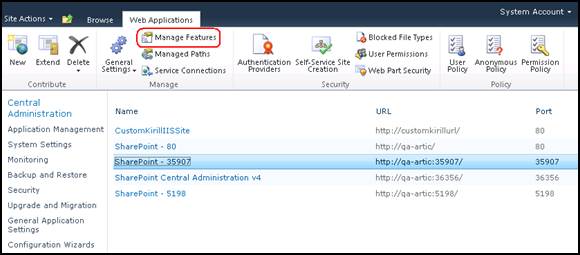
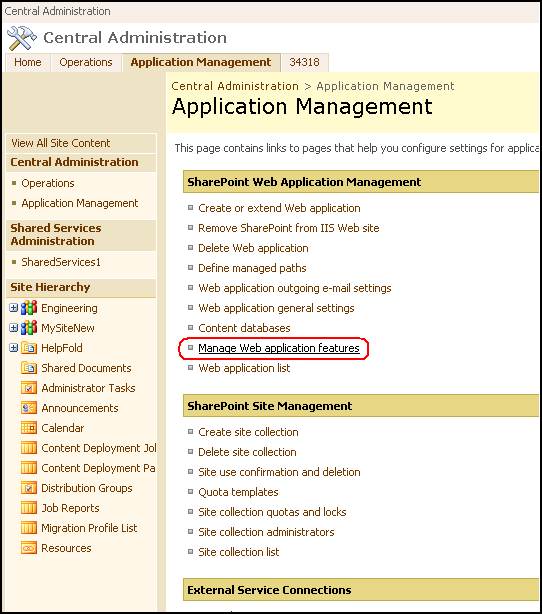
Step 6: Activate the SharePoint feature to complete the deployment.
While In Central Administration Activate Feature…
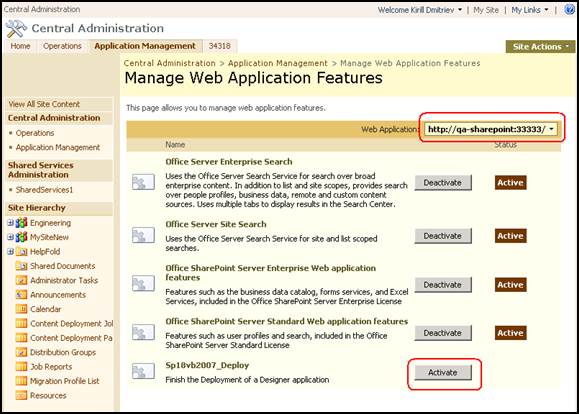
Select your web application and click on Manage Features:
Now click Activate:
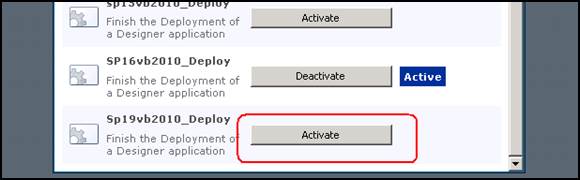
Make sure you have selected correct Web Application in the top right corner. Then click Activate:
Step 7: Change the SharePoint Code Access Security to permit your application to run properly.
See Changing Code Access Security (CAS) for details.
Step 8: Install your application’s database stored procedures.
If your application uses stored procedures and its database is on different production server than your development server you might need to deploy your stored procedures to the production server. Use the LoadStoredProcedures.bat file located in the application’s StoredProcedures subfolder, e.g.:
SharePoint 2010:
\C:\Program Files\Common Files\Microsoft Shared\Web Server Extensions\14\TEMPLATE\LAYOUTS\MyApp3\StoredProcedures
SharePoint 2007:
\C:\Program Files\Common Files\Microsoft Shared\Web Server Extensions\12\TEMPLATE\LAYOUTS\MyApp3\StoredProcedures
See LoadStoredProcedures.bat for details.
Step 9: Run your application in SharePoint. The application is now available and can be run at a URL such as:
http://SharePointServer:34318/_layouts/MyApp (note ‘_’: 38318/_layouts/MyApp)
Step 10: (Optional.) Add navigation to your application.
See Adding navigation to your application for details.
Step11: (Optional) During deployment and feature activation the following entry is added to the hosting application’s Web config file in order to handle JavaScript properly:
<add verb="GET,HEAD" path="ScriptResource.axd" type="System.Web.Handlers.ScriptResourceHandler, System.Web.Extensions, Version=3.5.0.0, Culture=neutral, PublicKeyToken=31BF3856AD364E35" validate="false" />
Sometimes the hosting application’s Web.config file already has the following entry in the httpHandlers section:
<add verb="GET,HEAD,POST" path="*" type="Microsoft.SharePoint.ApplicationRuntime.SPHttpHandler, …/>
In this case, the SharePoint Solution Package (WSP) adds the “GET.HEAD” entry after the “GET.HEAD.POST” entry which may cause problems with proper JavaScripts execution because “GET.HEAD.POST” will serve all requests, including those related to the ScriptResource. In this case manually reverse the order of these entries.
Locating application files on the SharePoint server
Changing Code Access Security (CAS)
Adding navigation to your application
Uninstalling (retracting) a SharePoint solution
Using Microsoft Access databases in SharePoint applications
SharePoint master page options