This example shows how to deploy an application built with Iron Speed Designer to DiscountASP.NET, a hosting service provider. While Iron Speed does not endorse DiscountASP.NET or any other hosting provider, it does provide a useful example of how to deploy an application.
Step 1: Create the deployment folder for your application.
The ‘Generate MSI Installer’ option (Deploy, Deployment Wizard...) creates the application deployment folder with all essential files required for hosting your application. The Deployment Wizard walks you through the deployment process and will install deployment related files in your application’s directory. See Deploying Applications with the Deployment Wizard for details.
If you are using the Iron Speed Designer Professional Edition, then you will need to manually create the deployment folder by copying files. When you are ready to deploy the tested application into a production environment, several additional steps are required, depending on the type of application being deployed. See Deploying Applications with the Deployment Wizard and Manually Deploying an Application to a Production Server for details.
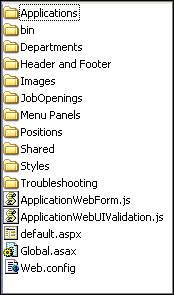
Check the contents of the deployment folder.
Step 2: Configure the database settings in your application’s Web.config file.
If you are using the Microsoft Access database, then place the database within your application’s folder that is to be deployed to the application hosting server. Make sure the database has read, write and execute permissions granted to users. Also, be sure to specify the database’s relative path in the Data Source element of your application’s Web.config file.
<add key="DatabaseJobApplication.mdb1" value="Provider=Microsoft.Jet.OLEDB.4.0;
Data Source=JobApplication.mdb;
Jet OLEDB:Database Locking Mode=1;
Mode=16"
/>
Specifying an absolute path for your Microsoft Access database generally will not work because your application must then be installed in a precise location and cannot be moved to other directories. For example, this will almost never work:
C:\Applications\MyApp1\JobApplication.mdb
If you are using the Microsoft SQL Server 2000 database, then provide the server name, username and the password fields in the database key as shown below. These credentials will come into effect once you transfer the contents of your Microsoft SQL database to the DiscountASP.NET SQL Server. Details on how this can be done are provided in Step 6 below.
< add key=”DatabaseNorthwind1” value =”Data Source=mssql03.discountasp.net;
Database=Northwind;
Trusted_Connection=no;
User ID=DB_228441_1_user;
Password=password”
/>
Step 3: Deploy your application to DiscountASP.NET’s server.
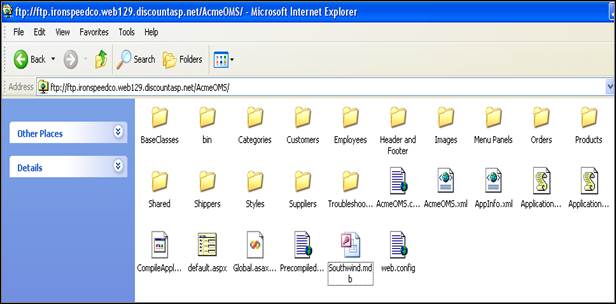
Log onto the DiscountASP.NET website and upload the deployment folder to the Temporary FTP address specified in your account by DiscountASP.NET.
If using Microsoft Access, make sure the database file is placed within the application’s folder.
Step 4: Install your application on the DiscountASP.NET server.
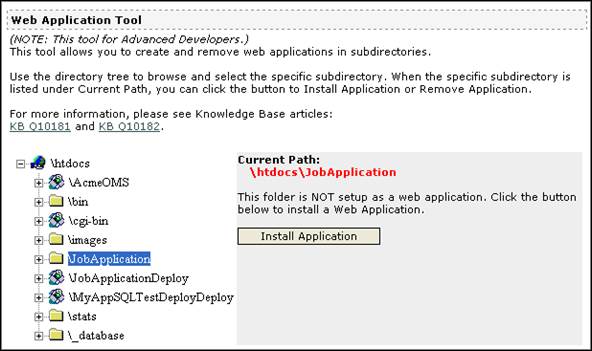
Once the deployment file has been uploaded to the FTP location, switch to the DiscountASP.NET website. Select Tools and Utilities, Web Application Tool. You will notice your application’s folder listed. Click the Install Application button to install the application as shown below. Their tool will confirm the installation and display a confirmation message.
Step 5: Set the Permissions Manager Settings at DiscountASP.NET.
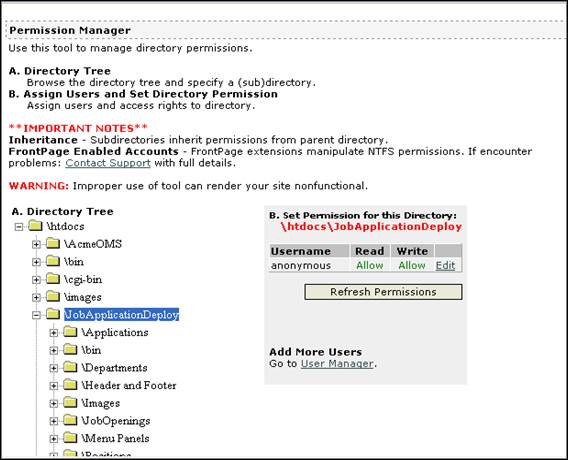
Select Tools and Utilities, Permission Manager. This tool manages directory permissions. Select your application in the Directory Tree in Section A and set permissions for the directory in Section B. In this example, the Username selected is anonymous and read and write permissions have been granted to this user.
Step 6: Set the database settings at DiscountASP.NET.
If using Microsoft Access, you have already specified the connection settings in your application’s Web.config file as previously described.
If using Microsoft SQL Server 2000, transfer the contents of your Microsoft SQL Server database to the Microsoft SQL Server at DiscountASP.NET. DiscountASP.NET’s website describes how database contents can be transferred:
http://kb.discountasp.net/article.aspx?id=10041
From the Start Menu, select "Programs" -> "Microsoft SQL Server" -> "Import and Export Data" then click "Next".
In the "Server" field, type in the Name or IP of the source server (your server), choose "Use SQL Server Authentication," type in your username and password, choose your database from the "Database" field, click "Next".
Note: You can also use Windows Authentication if the SQL server is a local server.
In the "Server" field, type in the hostname of the DiscountASP.NET SQL Server (this is listed in your hosting control panel), choose "Use SQL Server Authentication," type in your DiscountASP.NET database username and password (this was sent in your database order confirmation email), choose your database from the "Database" field, click "Next".
Choose "Copy objects...", click "Next".
Uncheck Use Default Option.
Click Options, uncheck "Copy Database users and database roles", "Copy SQL Server logins", "Copy object-level Permissions".
Leave next window as is, click "Next".
Click "Finish".
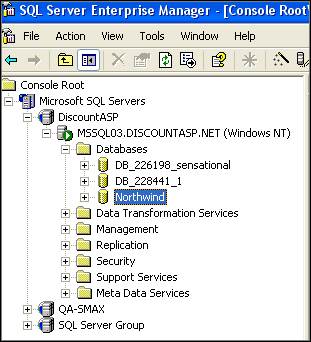
Once the contents have been successfully transferred, the next step would be to connect SQL Server 2000 using Enterprise Manager. Details on how this can be done are in the DiscountASP.NET’s Knowledge Base.
http://kb.discountasp.net/article.aspx?id=10013
Open Enterprise Manager, navigate to SQL Server Group (default group).
Right-click on “SQL Server Group”, select "New SQL Server Registration".
Type the SQL Server Name (found in your hosting control panel) in the Available Servers text box and click Add. Then press “Next”.
Select SQL Server Authentication as Authentication Mode. Then press “Next”.
Type in the Login and password (can be found in the activation email). Then press “Next”.
Press “Next” and then “Finish”.
This allows you to access the DiscountASP.NET website’s Microsoft SQL Server through your Enterprise Manager. Verify these details are identical to those specified in your application’s Web.config file in the deployment folder described in Step 2.
Refer to these Knowledge Base articles on the DiscountASP.NET website for details on Microsoft SQL Server settings.
How to connect to SQL Server 2000 using Enterprise Manager?
How to connect to SQL Server 2000 using Query Analyzer?
How do I get a copy of MS SQL Enterprise Manager and Query Analyzer?
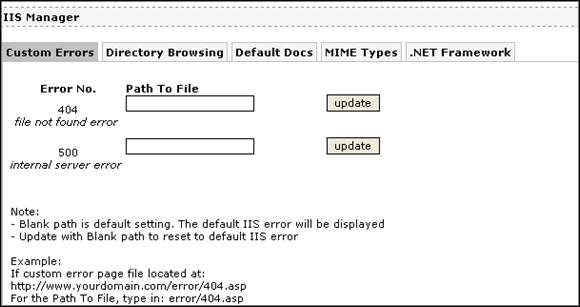
Step 7: Configure the Microsoft IIS Manager at DiscountASP.NET.
Select Tools and Utilities, IIS Manager and configure the settings in the IIS Manager’s tabs as per your application’s requirements.
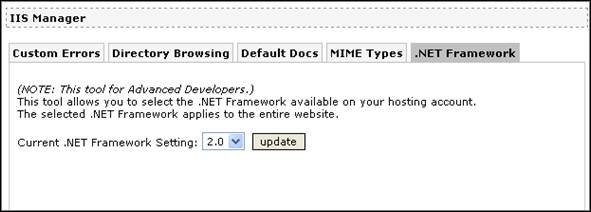
Switch to the .NET Framework tab and select the preferred type of framework. Please note that the type of .NET Framework selected is applicable for the entire site and is not on a per application basis. This implies that if you would like to deploy multiple applications of which some are based on .NET Framework 2.0 and some on .NET Framework 3.5, you should select the .NET Framework 3.5 option since .NET Framework 3.5 is backward compatible with applications built for .NET Framework 2.0.
Step 8: Run your application.
Run your application through the temporary URL provided to you by DiscountASP.NET. For example,
http://ironspeedco.web129.DiscountASP.NET .net/JobApplicationDeploy/
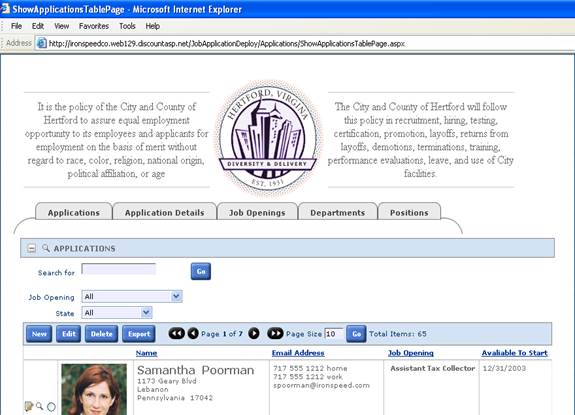
Congratulations! You have now successfully deployed your application. After the temporary site deployment, discuss with DiscountASP.NET how to convert this into a permanent site.
Deploying to Application Hosting Service Providers
Example: Deploying to CrystalTech
Example: Deploying to DiscountASP.NET
Example: Deploying to GoDaddy.com
Disabling Event Viewer Logging
Individual Hosting Provider Notes
Setting the .NET Trust Level for your Application