Updated March 26, 2010
Iron Speed Designer Version 7.0 and later
You can control the width of a page and its horizontal-alignment within the browser.
Step 1: In Application Explorer, open your application’s master page (HorizontalMenu.master, VerticalMenu.master, etc.) and switch to Layout Editor.
Step 2: In the Page Directives dialog (Right-click, Page Directives…) add this HTML code to the end of the Prolog section:
<table cellspacing="0" cellpadding="0" border="0" class="pbTable">
<tr>
<td>
And add this HTML to the top of the Epilog section:
</td>
</tr>
</table>
Step 3: Copy the pbTable class from BaseStyles.css to Styles.css so you can customize the class. Classes defined in Styles.css automatically override those in BaseStyles.css.
Step 4: In Styles.css, add a “width” attribute to the pbTable class. By default, the pbTable class does not contain a width attribute, so it defaults to 100% of the width of the browser. You can add a width attribute to set the page width.
.borderTable, .pbTable { /* page content container */
width: 600px;
}
Note that width specifications are only taken as “suggestions” by the browser, and the page width will actually depend upon the content within the table grid.
Step 5: Build and run your application.
Similarly you can center the page within the browser using margin-left and margin-right properties.
.borderTable, .pbTable { /* page content container */
margin-left: auto;
margin-right: auto;
}
A more complicated but flexible approach is to modify your master page using the Page Layout Spreadsheet, using the Tag Attributes dialog to add the desired page width and centering styles.
Step1: In Application Explorer, open your application’s master page (HorizontalMenu.master, VerticalMenu.master, etc.) and switch to Layout Editor.
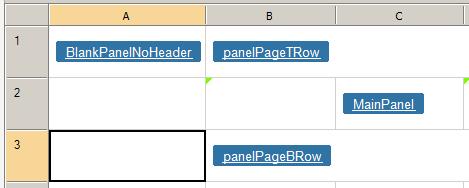
Step 2: Add a new (empty) column to the left of column A. Then, drag a “Blank Panel No Header” panel from the Toolbox into the top left cell of the master page.
Step 3: Move all pre-existing content on the master page into the newly added blank panel, leaving only the newly added blank panel as the only content at the master-page’s top level. This is easily accomplished by cutting the pre-existing content (select cells, Ctrl-C), zooming into the new blank panel and pasting (Ctrl-V) the ‘cut’ content into the new blank panel.

Step 4: In the newly added panel (now containing the page contents), add these attributes via the Tag Attributes dialog (right-click, Styles, Table…):
|
Attribute |
Value |
|
border |
0 |
|
cellpadding |
0 |
|
cellspacing |
0 |
Step 5: Zoom back out to the top-level of the master page containing the single newly added panel. Use the Tag Attributes dialog (right-click, Styles, Table…) to set the appropriate class and other desired style attributes, e.g.:
|
Attribute |
Value |
|
class |
pbTable |
Step 6: Copy the pbTable class from BaseStyles.css to Styles.css so you can customize the class. Classes defined in Styles.css automatically override those in BaseStyles.css.
Step 7: In Styles.css, customize the pbTable class as needed to achieve the page width or page centering result you desire.
Step 8: Build and run your application.
This approach allows you to to easily add, modify and remove styles.
Customizing Style Sheets and Page Styles